Project: Complete Online Car Rental System using PHP and MySQL with Source Code
About Online Car Rental System
Online Car Rental System using PHP and MySQL can book a car for trip, marriage, business meeting, office to home, home to office, home to a market where ever they want to travel as simple as that. Car Rental System specializing in renting cars to clients. It is an online system through which clients can view available cars, signup, login, view profile and book car.They even do not need to drive themselves driver is available with car. Prices are very less with all comfort.
Features of the Project
User:
The user is end user of our service. User can view information of available car, booking a car, easily get the car on rent, and also give feedback and can enquiry. User also views the discount and other information to get best deals.
- Car Booking
- View Car booking history
- Update His/Her profile
- Update his/her password
- View Car booking history
- Post Testimonials
- View Testimonials
- Logout
- 100% Responsive
Admin:
Admin is basically super user. He can add a car, manage booking cars, and rent and view feedback and enquiry and will keep track of each booking. Manage organization representatives.
- Admin can create vehicle brands
- Manage Vehicle Brands(Edit, Delete)
- Post Vehicle
- Manage vehicle(Edit,Delete)
- Manage Booking(Admin can confirm and Cancel Booking)
- Manage Testimonials (Active and Inactive)
- Manage Contact us Query
- Admin Can the details of registered users
- Admin can update the contact us details
- admin can also update the page content
- Admin Can the details of registered users
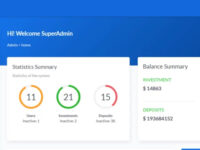
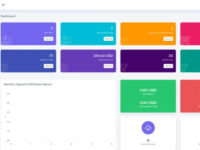
- Admin Dashboard
- Change Password
- 100% Responsive
Screenshots

online car rental system using php and mysql


car rental system booking

car rental system admin dashboard

How To Run?
Above all, to run this project you must have installed a virtual server i.e XAMPP on your PC. Online Car Rental System in PHP and MySQL with source code is free to download, Use for educational purposes only!
1st Step: Firstly, Extract the file
2nd Step: After that, Copy the main project folder
3rd Step: So, you need to Paste in xampp/htdocs/
Further, Now Connecting Database
4th Step: So, for now, Open a browser and go to URL “http://localhost/phpmyadmin/”
5th Step: After that, Click on the databases tab
6th Step: So, Create a database naming “carrental” and then click on the import tab
7th Step: Certainly, Click on browse file and select “carrental.sql” file which is inside the “db” folder
8th Step: Meanwhile, click on Go button.
After Creating Database,
9th Step: Moreover, Open a browser and go to URL “http://localhost/carrentalsystem”


Reviews
There are no reviews yet.